Most people set up a budget squat rack the same way. Unbox it, follow the picture sheet, tighten everything with the stamped wrench that came in the bag, and load it that night. A week later the video shows the uprights walking across the slab and the J-hooks tipping on a crooked re-rack, and the comments section tells them to bolt it down.
Budget squat rack setup is not an assembly problem. It is an inspection problem. The manual tells you which bolt goes where. It does not tell you that a capacity claim printed on a box means nothing until you put calipers on the tube, read the welds, and load the thing in small jumps while you watch the base. I have done that on nine racks in six years. The ones that failed did not fail loudly. They flexed first, and I was standing under them when they did.
Here is the order I work in now: inspect before you assemble, square before you torque, level before you load, and test before you trust.
Why you should trust me
I am Andre. I have been powerlifting for 15 years out of a garage in Charlotte, NC, with a raw 500 lb squat and a 605 lb deadlift. I built that gym bolt by bolt after my commercial gym doubled its membership price in 2019. Before any of that I spent four years as a welder's apprentice, and I work in industrial maintenance now, which is a long way of saying I read welds the way most people read a spec sheet.
I have assembled, loaded, and deliberately abused nine squat racks in the last six years. One bowed at 405. One wall-mount pulled its top bolts straight out of a stud while I was standing under the bar. I keep a grease-pencil logbook on the wall of the garage: tube gauge, weld penetration, bolt torque, and the exact weight where the wobble starts. I squat three nights a week at 6 a.m., and I have failed reps at 495 that only the safety bars kept off my neck.
That is the standard I hold a rack to, and it is the same standard I hold a rack that costs less than a decent barbell to. Cheap is allowed. Loose is not.
How I picked and how I tested
The rack below is not the rack I would buy for a 600 lb squat. It is the rack I would tell a friend to buy if he is squatting in the 200s and 300s in a one-car garage and wants to press inside it. Those are two different jobs, and the whole point of this guide is to keep you from buying for the second job when you have the first one.
Everything below gets judged against the same checklist, in this order:
- Tube gauge. Measured with calipers, not read off the sticker. Stickers are marketing. Calipers are facts.
- Weld penetration at the corner joints, where the uprights meet the base. A weld should show a visible toe line where it fuses into the base metal. A weld that sits on top of the joint like a bead of caulk is a cosmetic weld, and a cosmetic weld is a lie wearing a tuxedo.
- Hardware grade. Grade-8 bolts carry head markings. If the bag is full of unmarked zinc hardware, you are replacing it before you build.
- J-hook thickness and shape. Cheap hooks bend and tip when you re-rack crooked, which is exactly when you need them to hold.
- Base footprint and how the feet sit. A rack that rocks on a sloped garage slab before it is loaded will rock worse after.
- Adjustment mechanism slop. A pull-pin that rattles in its hole unloaded will rattle louder with 315 on the uprights.
For load testing, I jump in small increments, stand back, and watch the base while the bar sits on the hooks. Then I grab an upright and push it laterally, because a rack that only resists force in one direction is a rack that will surprise you. I re-rack crooked on purpose. And I fail a rep onto the safeties at a weight I can afford to drop, because the safety bars are the entire reason the rack exists.
The gear below is what I would put in a first garage setup, plus one thing that is not gym equipment at all and earns its place anyway.
The rack you build around
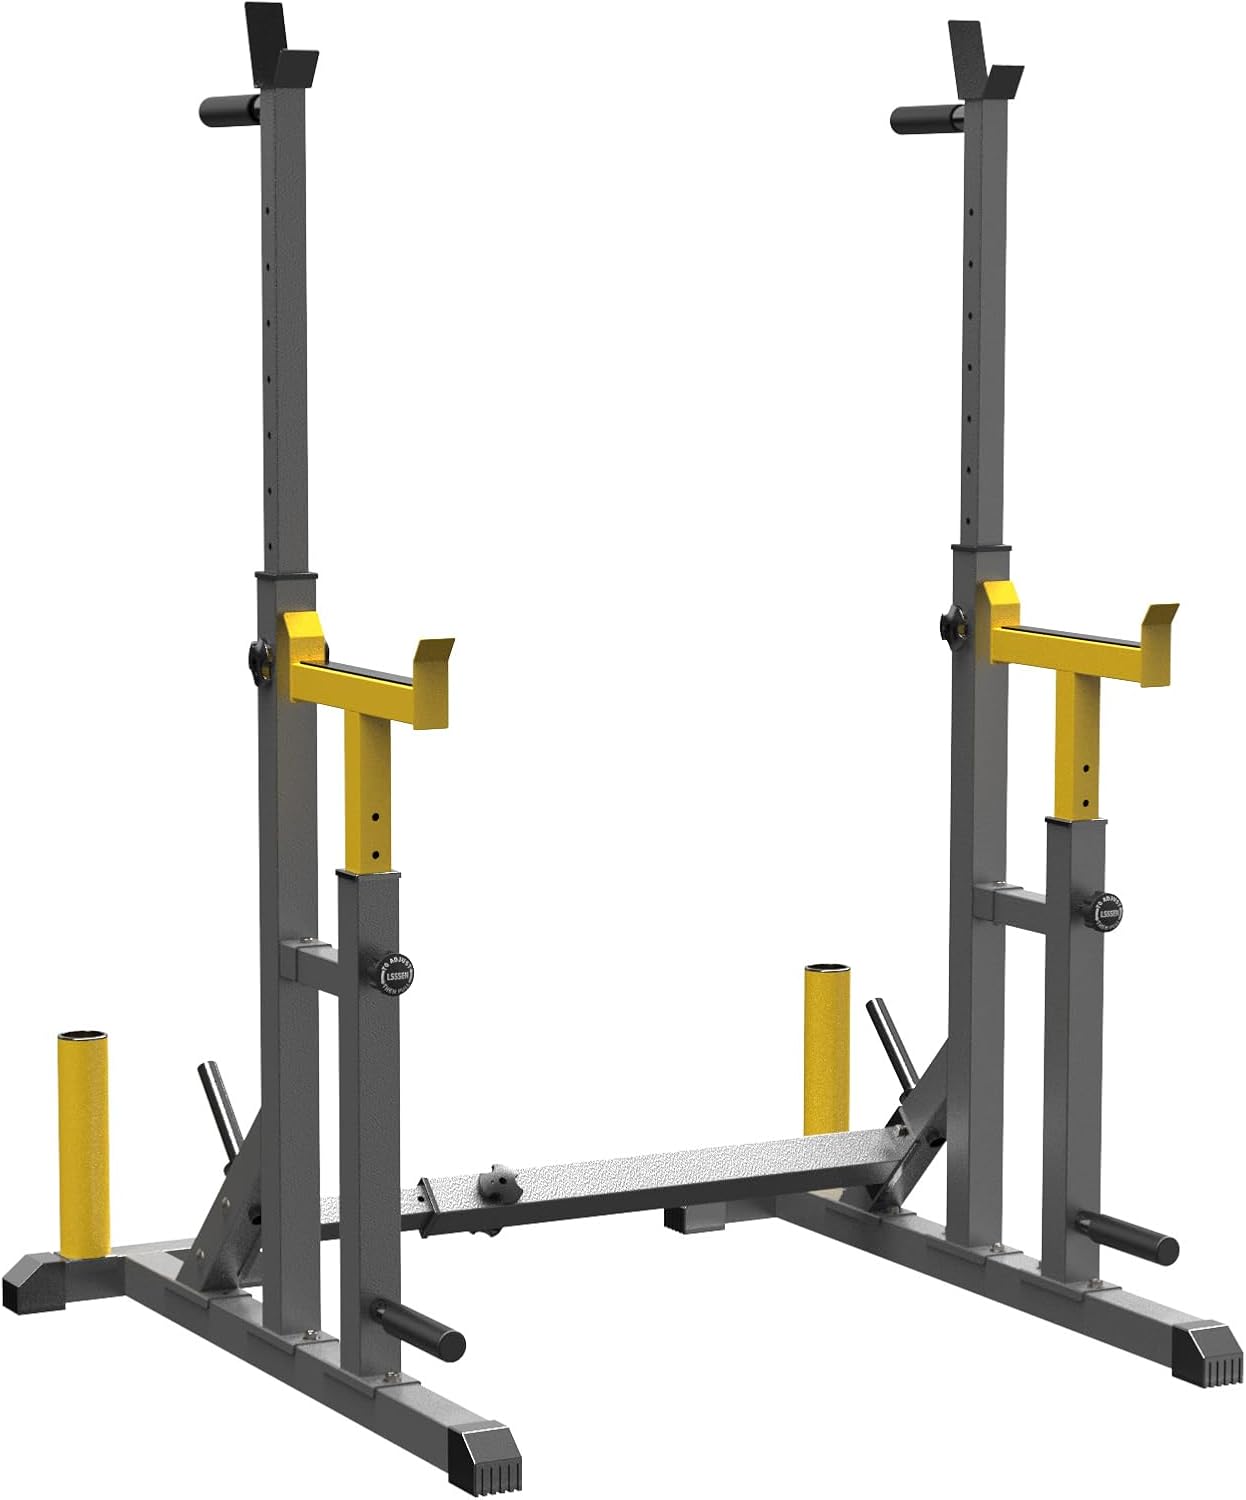
Budget pick: K KiNGKANG Adjustable Squat Rack,Bench Press for Home Gym Load 690LBS
 Visit on Amazon →
This is an adjustable squat rack, and the seller rates it for a 690 lb load. Treat that number the way I treat every capacity claim: as something to verify, not something to repeat. The rating is a legal document, not a fact, until you have put your own eyes on the steel and your own weight on the bar.
The adjustable design is the appeal. It squats, it benches, and it fits in a space where a full power rack will not. For a garage lifter working in the 200s and 300s with a barbell and a bench, that is a real job done at a real price. What I would check the day it lands, in order:
- Calipers on the upright tube, then compare that number to the capacity claim on the box.
- The weld at the base of each upright, looking for penetration rather than a pretty bead.
- Whether the J-hooks are welded plate or bent sheet, and how thick.
- Vertical play in the adjustment pin. Grab the upright and try to rock it before anything is loaded.
- The bolt bag. Grade-8 or a trip to the hardware store.
Do that inspection before you assemble, not after. Once it is built and bolted, you have lost your leverage to send it back.
Flaws but not dealbreakers: Adjustable racks in this class trade rigidity for versatility. If your working squat is north of 400 and climbing, you want a fixed flat-foot rack in real 11-gauge steel and you should be shopping a tier up. A rack with thinner tube and a high capacity sticker is not the rack you want under a heavy squat, no matter what the box says.
Anyone in a garage or spare room who needs one piece of steel to squat, press, and bench with, and who is honest about their working weights, will get years out of this.
The gear that saves your knees during the build
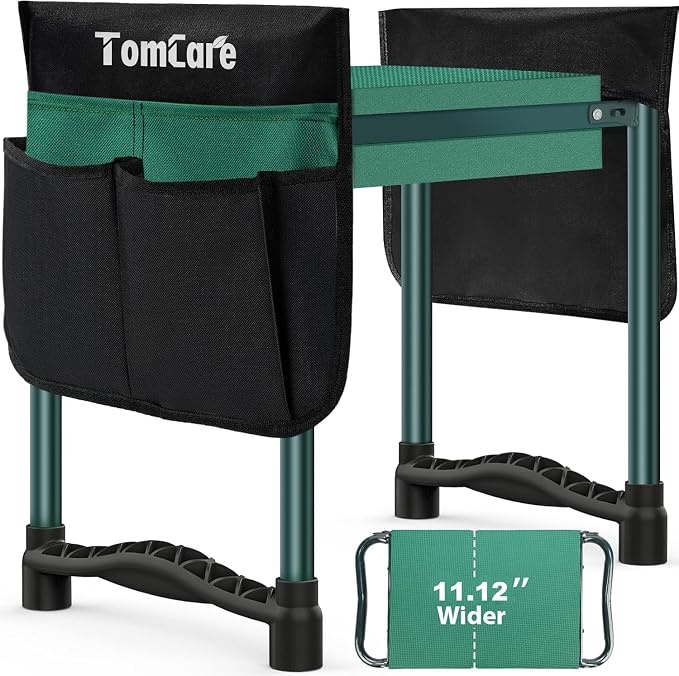
The assembly helper: TomCare Garden Kneeler and Seat, 11.12" Kneeling Pad Sturdy Garden Bench
 Visit on Amazon →
I am not going to pretend this is gym equipment, because it is not. It is a garden kneeler, and it lives in my garage for one reason: rack assembly on a concrete slab is 90 minutes of kneeling with a wrench in your hand, and a folded towel stops helping at the 20-minute mark.
Flip it to the kneeling position and you get a padded surface plus side rails you can push against to stand up, which matters a lot more at 38 than it did at 25. Flip it the other way and it is a low seat at working height for plate changes, chain oiling, and the kind of floor-level maintenance that a rack needs every few months. When I am setting J-hook heights or greasing the pull-pin on the adjuster, this is what I am sitting on.
What it is not: it is not a bench. Do not put a barbell over it. Do not use it as a spotter. Do not load it with plates. It holds a person sitting or kneeling, and that is the whole job.
Flaws but not dealbreakers: It is a light-duty piece of garden gear, so the frame will not survive being used as a step stool or a work platform. Keep it to knees and seat and it lasts.
Anyone building a rack alone in a garage, or anyone who does floor-level work on their equipment, will use it more than they expect.
The actual setup workflow
This is the sequence. Do it in this order and you skip the mistakes I have already made for you.
Step one: Measure the space and the ceiling. Put tape on the floor where the rack will live and stand inside it with a bar on your back. Check the ceiling height with your arms overhead for pressing, and check the garage door track and any opener rail. A rack that fits until you press in it is a rack that does not fit.
Step two: Inspect before you assemble. Lay every tube on the floor. Look at every weld. Look at the tube ends for deformation from shipping. If a joint looks like it was welded by someone in a hurry, stop and start the return before you spend an hour building it. This is the single most important step in the entire guide, and it takes 10 minutes.
Step three: Sort the hardware. Grade-8 bolts have markings on the head. If yours do not, buy replacements. Hardware store bolts are the cheapest insurance you will ever buy for a rack, and a rack that ships with soft hardware is a rack that was built to a price, not a load.
Step four: Assemble loose, then square, then torque. Hand-tighten everything first. Stand the rack up, check it against a level and against the diagonals, and only then run the bolts down tight. If you torque one side before the frame is square, you build the twist into the rack permanently.
Step five: Level the feet. Garage slabs slope toward the door so water runs out. That slope is why your rack rocks. Shim the low foot with a hard shim, not a folded rag, and re-check with a level on the crossmember.
Step six: Decide about anchoring on purpose. Bolting down is the strongest option and it is not always the right one. If you rent, or if you might move the rack, a flat-foot design with the feet weighted is a legitimate choice. What is not legitimate is bolting a light rack to the floor to make up for steel you should not have bought. Anchor into a slab you own, use the right anchors, and check the torque seasonally.
Step seven: Set the J-hooks and safety bars by the failed-rep test. Set the safeties so the bar lands an inch or two below your bottom position, not at your chest. Then test it: empty bar first, then a light load, then a weight you can afford to dump. A safety bar you have never caught a rep on is a decoration.
Step eight: The load test. Load in small jumps and step back and watch the base between each one. Watch the feet for lift, the uprights for bow, and the J-hooks for tip. Grab an upright and push it sideways. Re-rack crooked on purpose, twice. If anything moves at a weight below your working weight, stop and fix it before you go heavier. This is the step everyone skips because the rack is new and they are excited.
Step nine: Mark it and maintain it. Grease-pencil the uprights where your J-hooks live so you can see if anything drifts. Re-torque every bolt after the first week, again after the first month, then check the anchors every season. A rack is not a piece of furniture. It is a structure, and structures get inspected.
The competition and why it lost
The Rogue RML-390F is the best flat-foot power rack I have loaded, clean welds, real 11-gauge steel, and it does not move at 500 lb without a single bolt in the floor. The Titan T-3 is the best budget rack that does not feel like a budget rack, and the REP PR-4000 is the best mid-range value of the group. The Bells of Steel Hydra is the dark horse with a bolt-down base for less than you would expect.
None of those are what this article is about, and none of them are wrong answers. They are answers to a different question. If you are squatting 500 and up, buy one of them and stop reading budget rack guides. If you are squatting in the 200s and 300s and want to press inside your rack, the adjustable rack above does the job for a fraction of the money, and the difference goes into a better bar.
Wall-mounts are the other option people ask about. They are great until they are not. If you do not hit a stud dead center, you are hanging your face from drywall, and I have personally pulled a wall-mount's top bolts out of a stud. Check the stud layout and the anchor spec before you buy one, not after.
And anything with thin tube and a four-figure capacity sticker should stay in the box it shipped in.
What this all costs
Here is the math, and you can run it with whatever the current numbers are.
Take what you pay for the rack, divide it by 156, which is three sessions a week for a year. If you train for two years, divide by 312. That is your cost per session, and it is almost always less than a single drop-in fee at a commercial gym. The rack is also the one piece of equipment in your gym that has to outlive everything else you own, which is why the inspection steps above matter more than the sticker on the box.
The kneeling pad is the same math at a much smaller scale. Divide its price by the number of times you will kneel on concrete to set a hook, swap a plate, or check a bolt. In my garage that number got large fast.
What you are actually buying with the extra 10 minutes of inspection is not a better rack. It is the confidence to load 315 in a cold garage at 6 a.m. without wondering whether today is the day the thing moves. Check the welds, check the gauge, square it, level it, test it, and then go squat.