Most people set up a squat rack backwards. They buy the rack, drag the box into the garage, tighten whatever bolts feel loose, slide a bar into the J-hooks, and load it. Then they wonder why the whole thing walks an inch to the left every time they re-rack a heavy squat.
A home gym squat rack setup is a sequence, not a purchase. Floor first. Footprint second. Anchors or a platform third. Safety bars fourth. Plates last. Get that order wrong and you will be re-drilling holes in a concrete slab at nine at night, which I have done twice, and both times it was because I was in a hurry to squat.
I have built and rebuilt racks in a Charlotte garage for six years. Here is the order that actually works, the parts that matter, and where a two-piece setup covers most of what a home gym needs.
Why you should trust me
I have been powerlifting for 15 years, with a raw 500 lb squat and a 605 lb deadlift, and I built my garage gym bolt by bolt after my old gym doubled its membership price in 2019. Before I moved into industrial maintenance, I spent four years as a welder's apprentice, which is why I read a weld the way other people read a spec sheet.
I have assembled, loaded, and deliberately abused nine squat racks in the last six years, including one that bowed at 405 and a wall mount that pulled its top bolts straight out of a stud. I keep a grease pencil logbook on every rack: tube gauge, weld penetration, bolt torque, and the exact weight where the wobble starts. I squat in that garage three mornings a week at 6 a.m., and I have failed a rep at 495 with nothing between the bar and my neck but the safety bars. That is the standard I set up to.
How I picked and how I tested
Every rack has to answer three questions before it earns a spot in my garage. What gauge is the steel, really, calipers and not the sticker? Where are the welds, and do they penetrate or just look pretty? And what happens at the rated capacity, does it wobble, bow, or hold?
I do not repeat a capacity claim without checking it against the tube gauge. A 2,000 lb sticker on 14-gauge steel is a legal document, not a fact, and the difference between the two is the reason I have a jack stand and a grease pencil in my truck.
For the two pieces in this guide, I am telling you what the listings actually specify, and what you should verify with calipers and a torque wrench the day the freight shows up. I am not going to hand you a stability number I did not earn on your floor.
The rack is the piece you build the room around
The rack is the one piece of equipment that has to outlive everything else you own. Benches wear out. Bars bend. Bands snap. The rack stays, which means it is also the piece you should spend the most time thinking about before you spend a dollar.
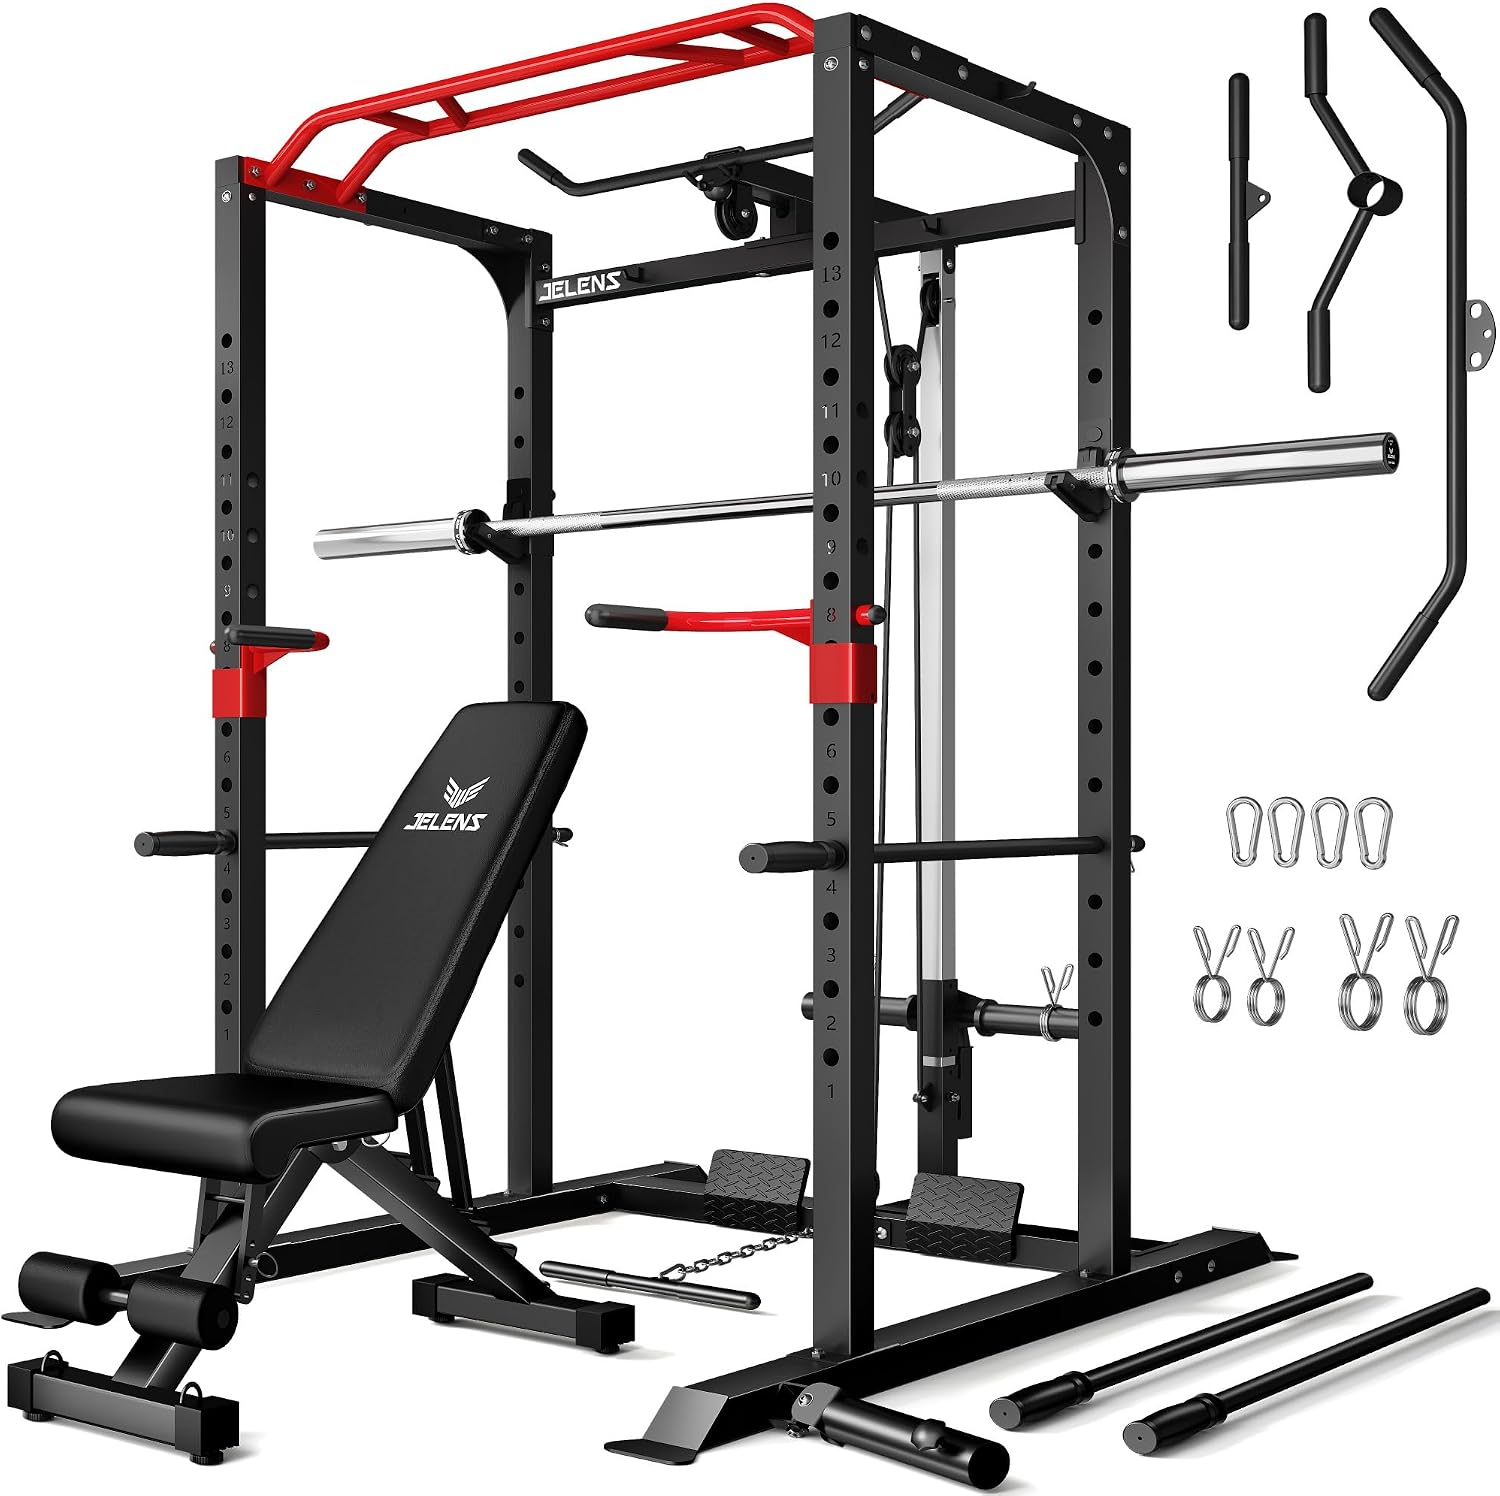
Our pick: JELENS S11 Power Cage, 2000LB Multi-Function Power Rack with LAT Pulldown, Squat Rack with Adjustable Pulley System and Training Attachments, Weight Rack for Home Gym
 Visit on Amazon →
This is a full cage, not a half rack, and that matters for two reasons. A cage gives you four uprights and a top frame, so the structure braces itself instead of leaning on a single pair of posts. And it gives you somewhere to hang a pulley system, which is what the S11 does: lat pulldown and an adjustable pulley system built into the frame, plus the training attachments that come with it. For a garage that has to cover squats, bench, rows, and pulldowns in one footprint, that is the right shape of machine. Check current Amazon price.
The trade is complexity. A multi-function cage has more bolts, more moving parts, and a cable stack that will be the first thing to get sloppy if you ignore it. Cables stretch, clamps loosen, and a pulley that runs rough tells you about it long before it fails. Two things I would verify the day it arrives: tube gauge with calipers, because the rating sticker is a claim and not a measurement, and the hardware bag, because a rack is only as strong as the bolts holding the joints together. Grade-8 or better, washers and lock nuts, not hardware-store zinc.
Flaws but not dealbreakers: A cage with a pulley system is heavier and takes longer to assemble than a plain rack. Budget a full evening and get a second person for the top frame. The lat pulldown cable also needs periodic tensioning, so put a wrench on it every few months.
Anyone with one garage wall who needs to squat, bench, and pull in the same square footage should start here.
The dumbbells that fill the gaps
A rack covers barbell work. It does not cover the accessory work that keeps your shoulders healthy and your squat from stalling: rows, split squats, lateral raises, curls, and a pile of pressing volume at weights a barbell is bad at.
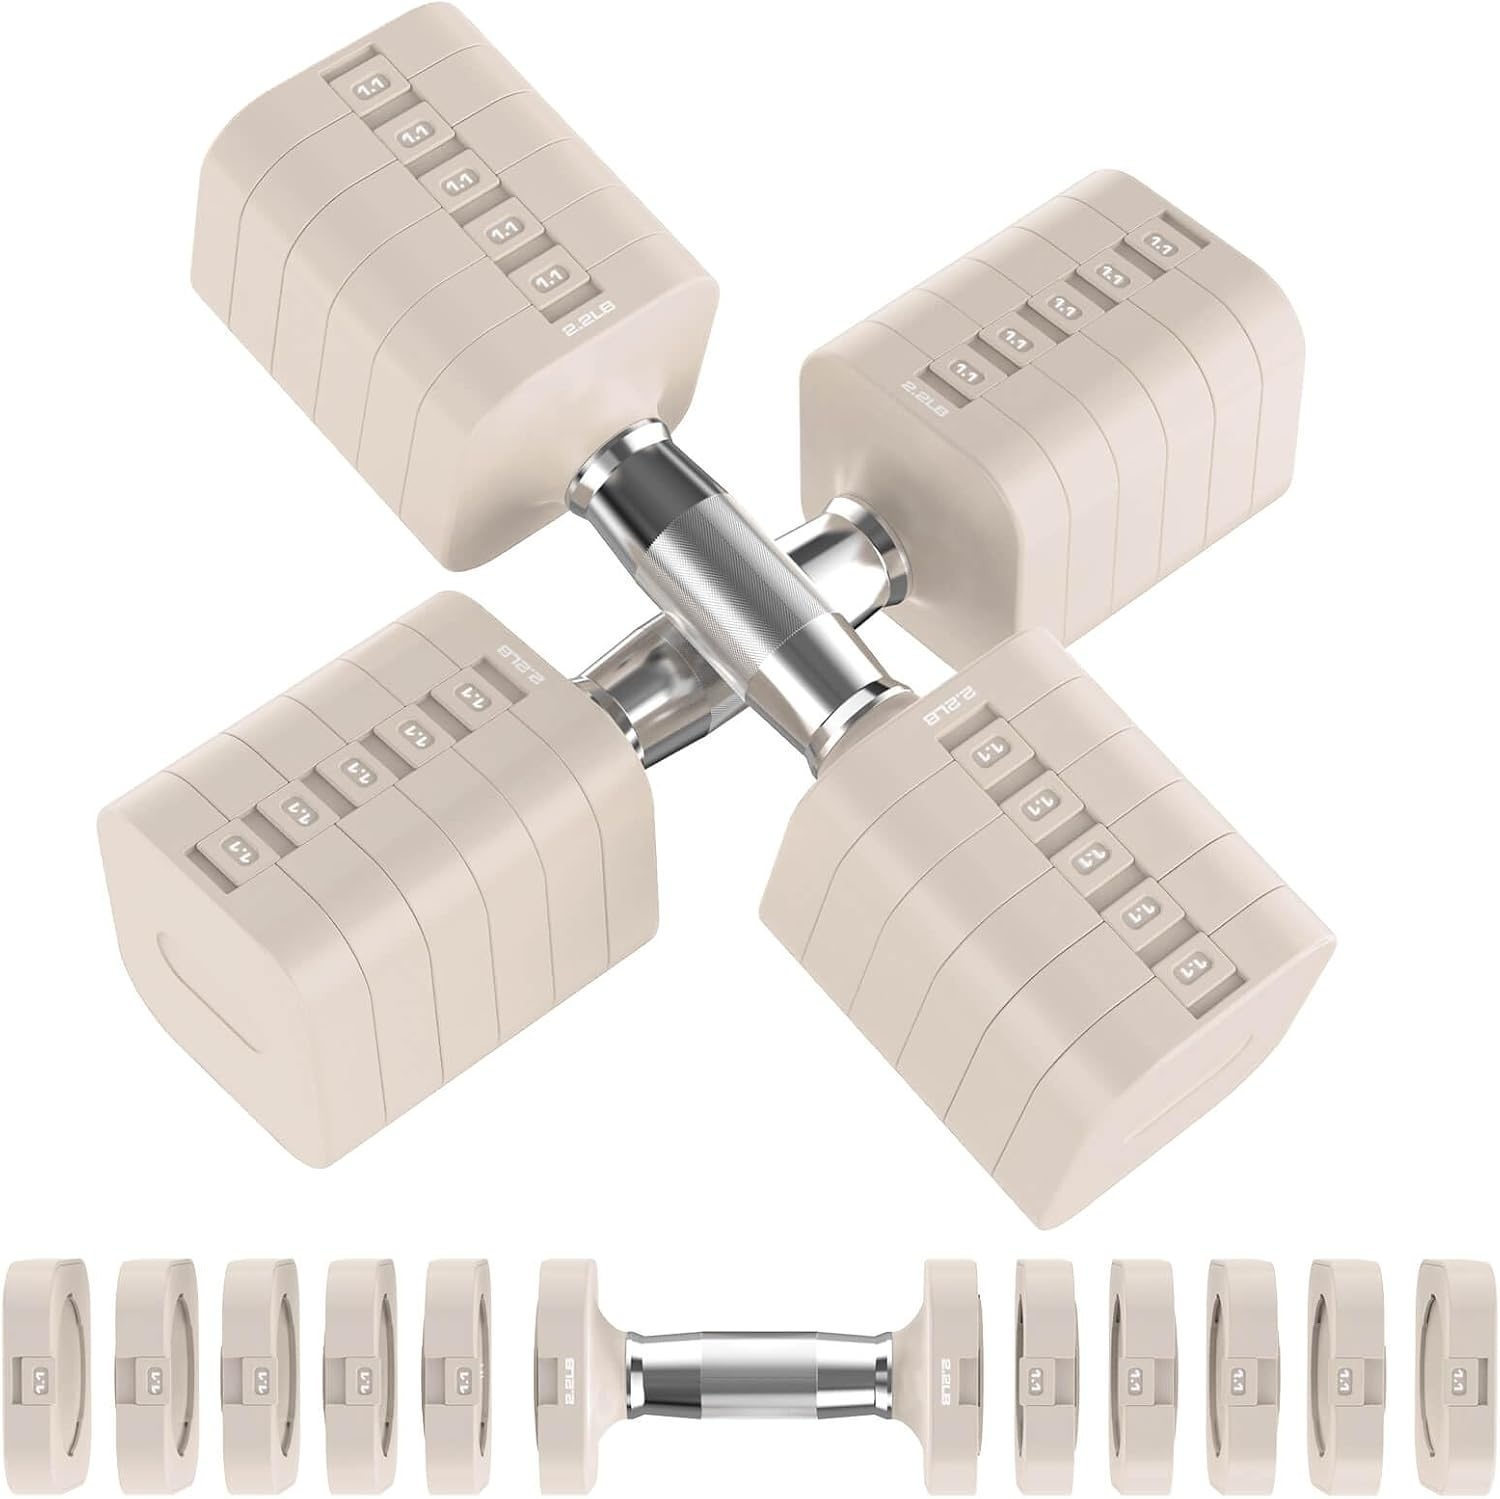
The accessory: Hezeyferg 30.8LB Adjustable Dumbbell Set, Hand Weights Set for Home Gym
 Visit on Amazon →
The 30.8 lb figure in the name tells you exactly what class this set is in: light to moderate, adjustable, and built for the work a barbell does badly. Warm-ups, lateral raises, curls, rear delts, split squats, high-rep rows, and volume pressing. If you are trying to dumbbell bench a pair of 100s, this is not that set, and nobody should tell you it is. What it is: a compact, storable pair that replaces a whole rack of fixed dumbbells in a garage where floor space is already spoken for. Check current Amazon price.
The failure mode on any adjustable dumbbell is the plate-change mechanism, so treat that as your pre-flight check. Seat the collars or locking system fully every single set, and re-check them mid-workout when you switch weights. Light dumbbells used for high reps are forgiving, but a plate that slips off at the top of a press is not, no matter how light it is.
Flaws but not dealbreakers: Adjustable sets always feel a little longer in the hand than fixed dumbbells, and the change-over takes seconds you would rather spend lifting. That is the price of not owning fifteen pairs of dumbbells.
Anyone doing accessory work, warm-ups, and travel or rental setups will get the most out of a set like this.
The actual setup workflow
Now the part you came for. This works whether you bought a cage, a half rack, or a flat-foot rack, and it works in a one-car garage with a sloped slab.
Step one: Measure the ceiling before you measure anything else. A rack needs room for the uprights plus your standing reach. If you plan to press overhead inside the cage, you need your hands at full lockout, plus the bar, plus a couple of inches of daylight. An 8-foot ceiling handles squats and bench fine. It does not handle a standing press unless you are short or you press outside the rack. Find that out before the freight truck arrives, not after.
Step two: Read the floor. A concrete slab is a fine base for a rack, and it is unforgiving on dropped bars and on your knees, which is why deadlifters build a platform. Check two things first: slope and moisture. Garages are poured with a slope toward the door, and a rack sitting on a slope will let the bar roll and the frame sit uneven. Shim the feet until the uprights are plumb. If the slab holds moisture, keep the rack feet out of it, because rust starts at the base plates.
Step three: Lay out the footprint in chalk. You need roughly three feet behind the rack to pull a bar out of the hooks, and about two feet on each side to load plates without walking into a wall. Mark the whole footprint with tape and live with it for a day before you drill anything. It costs nothing to move tape and it costs a slab patch to move anchors.
Step four: Decide anchored or not anchored. A bolted base is more stable than a flat-foot base, always, and there is no design that gets around that. If you rent, or if you are not drilling a slab you do not own, choose a rack with a wide flat-foot base and add weight storage on the back posts, because plates on the frame are the cheapest stability you can buy. If you are anchoring, use wedge anchors sized to the slab, drill with a hammer drill and a matched bit, vacuum the dust out of the hole, and torque them down. Understand that a wedge anchor is a permanent hole. If you bolt a cheap rack to the floor, you spent money on anchors instead of spending it on steel that would not need them.
Step five: Assemble bottom-up and torque in stages. Base first, then uprights, then the top frame and crossmembers. Snug everything, torque it, then re-torque after your first real session, because joints settle. Bolt-together is fine. Wobble is not. If the rack still moves after torquing, something is out of square: loosen the frame, measure the diagonals corner to corner, pull it square, and tighten again.
Step six: Set the safety bars before you set the J-hooks. Safeties go where a failed rep lands, not where they look right. For squats, set them so the bar touches them when you are a couple of inches below parallel, which catches you without forcing you to dump the bar. For bench, set them just below your chest line at the bottom, so you can still touch your chest but a missed rep cannot get past them. Then set the J-hooks at a height where you can unrack with a slight knee bend and no calf raise, because a rack that makes you stand on your toes is a rack that will hand you a bad unrack on a heavy day.
Step seven: Break in the pulley system. Cables stretch in the first few sessions. Run the lat pulldown through full range with light weight, re-tension the cable, and check the clamps before you trust a heavy pulldown. Same with any chain or strap attachment that came in the box.
Step eight: Test before you max. Load half your working weight and re-rack it hard, twice. Then 75 percent. Watch the base, the uprights, the J-hooks, and the safeties. If the rack walks, the hooks tip, or the frame flexes, stop and fix it before you add another plate. This is not a formality. It is the whole point of owning a rack.
What to check the day the freight shows up
- Tube gauge with calipers, not the sticker on the box.
- Weld penetration at the base plates and the top frame joints. A pretty bead with no penetration is a lie wearing a tuxedo.
- Hardware: grade-8 bolts, washers, and lock nuts, not hardware-store zinc.
- J-hook fit. They should sit flat on the uprights and not tip when you re-rack crooked.
- Pulley cable, clamps, and carabiners, because the cable is the weak link in any multi-function cage.
- Safety bar pins. They should lock positively in every hole, with no play you can feel by hand.
The rack types that did not win here
A wall-mounted rack is great until it is not. If you do not hit a stud dead center, you are hanging your face from drywall, and I have watched top bolts pull out of a stud that looked fine from the garage floor. Half racks save space and money, but they give up the top frame and the back uprights, and that frame is where a lot of the structure comes from. A bare squat stand with no safeties is a barbell on a bad day.
For one wall in a garage, a full cage with a pulley system covers more lifts than any of them, which is why it is the recommendation in this guide.
What this all costs
The rack is the big line item. The dumbbell set is the smaller one, and the hidden costs are the ones nobody budgets for: anchors and a hammer drill bit, a torque wrench if you do not own one, a plywood platform if you deadlift, and the foam or rubber you put under the rack so the slab stops eating your plates.
I am not going to quote you a number, because prices move and a number I type today is wrong next month. Check current Amazon price on both product pages and do the math against your own budget. Over five years of squatting three times a week, the rack is the cheapest piece of equipment you will ever own per use, and the anchors are the cheapest insurance.
Day one, in order
Measure the ceiling. Read the floor. Tape the footprint. Decide anchors before you drill. Assemble bottom-up and torque in stages. Set the safeties before the J-hooks. Break in the cable. Test at half and three-quarters before you load anything heavy.
Then write your own numbers in a notebook: tube gauge, bolt torque, the weight where you first felt movement. Six months from now, when the rack feels different, that page tells you whether something changed or you just got stronger.
The rack is the one piece of equipment that has to outlive every other piece you own. Set it up like that, and it will catch you the day you need it.