Most home gym racks do not fail because of the steel. They fail because of where the holes went into the concrete, which way the uprights face, and whether anyone thought about pulley routing before the frame was standing up against the wall. A power rack with cable crossover is two machines sharing one footprint, and if you build it in the wrong order, you get to take it apart and start over.
I have assembled, loaded, and deliberately abused nine squat racks in the last six years, including one that bowed at 405 and a wall-mount that pulled its top bolts clean out of a stud. I squat in a garage in Charlotte, NC three nights a week at 6 a.m., and I have failed reps at 495 that only the safety bars kept off my neck.
This is the order I build a rack in, the checks I run before I trust it, and the two crossover cages I would put in a garage that has to do barbell work and cable work in the same square of floor.
Why you should trust me
I spent four years as a welder's apprentice before I moved into industrial maintenance, which is a polite way of saying I read welds the way other people read spec sheets. Every rack that comes through my garage gets a grease-pencil logbook entry: tube gauge, weld penetration, bolt torque, and the exact weight where the wobble starts. I have owned and assembled the cheap stuff and the expensive stuff, and I have watched a rack walk across a floor under a load its sticker said it could handle.
The rule I work from is simple. A rack that wobbles at 315 will kill you at 405. There is no negotiation on that. You are not buying steel, you are buying the welds and the geometry that keeps the steel where it belongs, and you are buying a base that stays put when a rep goes wrong at 6 a.m. with nobody else in the garage.
How I picked and how I tested
Two racks made the cut for this guide, and neither earned a spot from a capacity sticker. A number on a box is a claim, and claims are cheap. Here is the filter I run any cage through before I will put my face under it.
- Tube gauge first, measured with calipers, not read off the listing. 11-gauge is the standard serious racks are built to, and thinner tube flexes under real loads.
- Welds second. I want penetration at the corner joints, not a wide cosmetic bead sitting on top of the steel like frosting.
- Hardware third. Grade-8 bolts, not the hardware-store stock that ships with cheap racks. Cheap bolts stretch, and stretched bolts mean a frame that moves.
- Safety bars and spotter arms rated at or above your working squat, not your warm-up.
- Load test last. Staged, from an empty bar up to the weight the rack claims, watching the base, the joints, and the uprights the whole way.
That is the same filter to run before you click buy. It also tells you which questions to ask about a rack you are standing in front of. For a rack with a cable crossover there is a second test: cable travel, pulley alignment, and whether the cables rub the frame when you pull from an angle. A crossover that binds under load is worse than no crossover, because you will stop using it and the machine becomes a very expensive squat stand.
The rack and the crossover system you will need before you start
You cannot set up a rack that flexes. Pick the frame first, then run the setup steps below in order. Both of the racks here are full cages with a cable system, which is the configuration that lets one footprint handle squats, bench, rows, lat work, and presses.
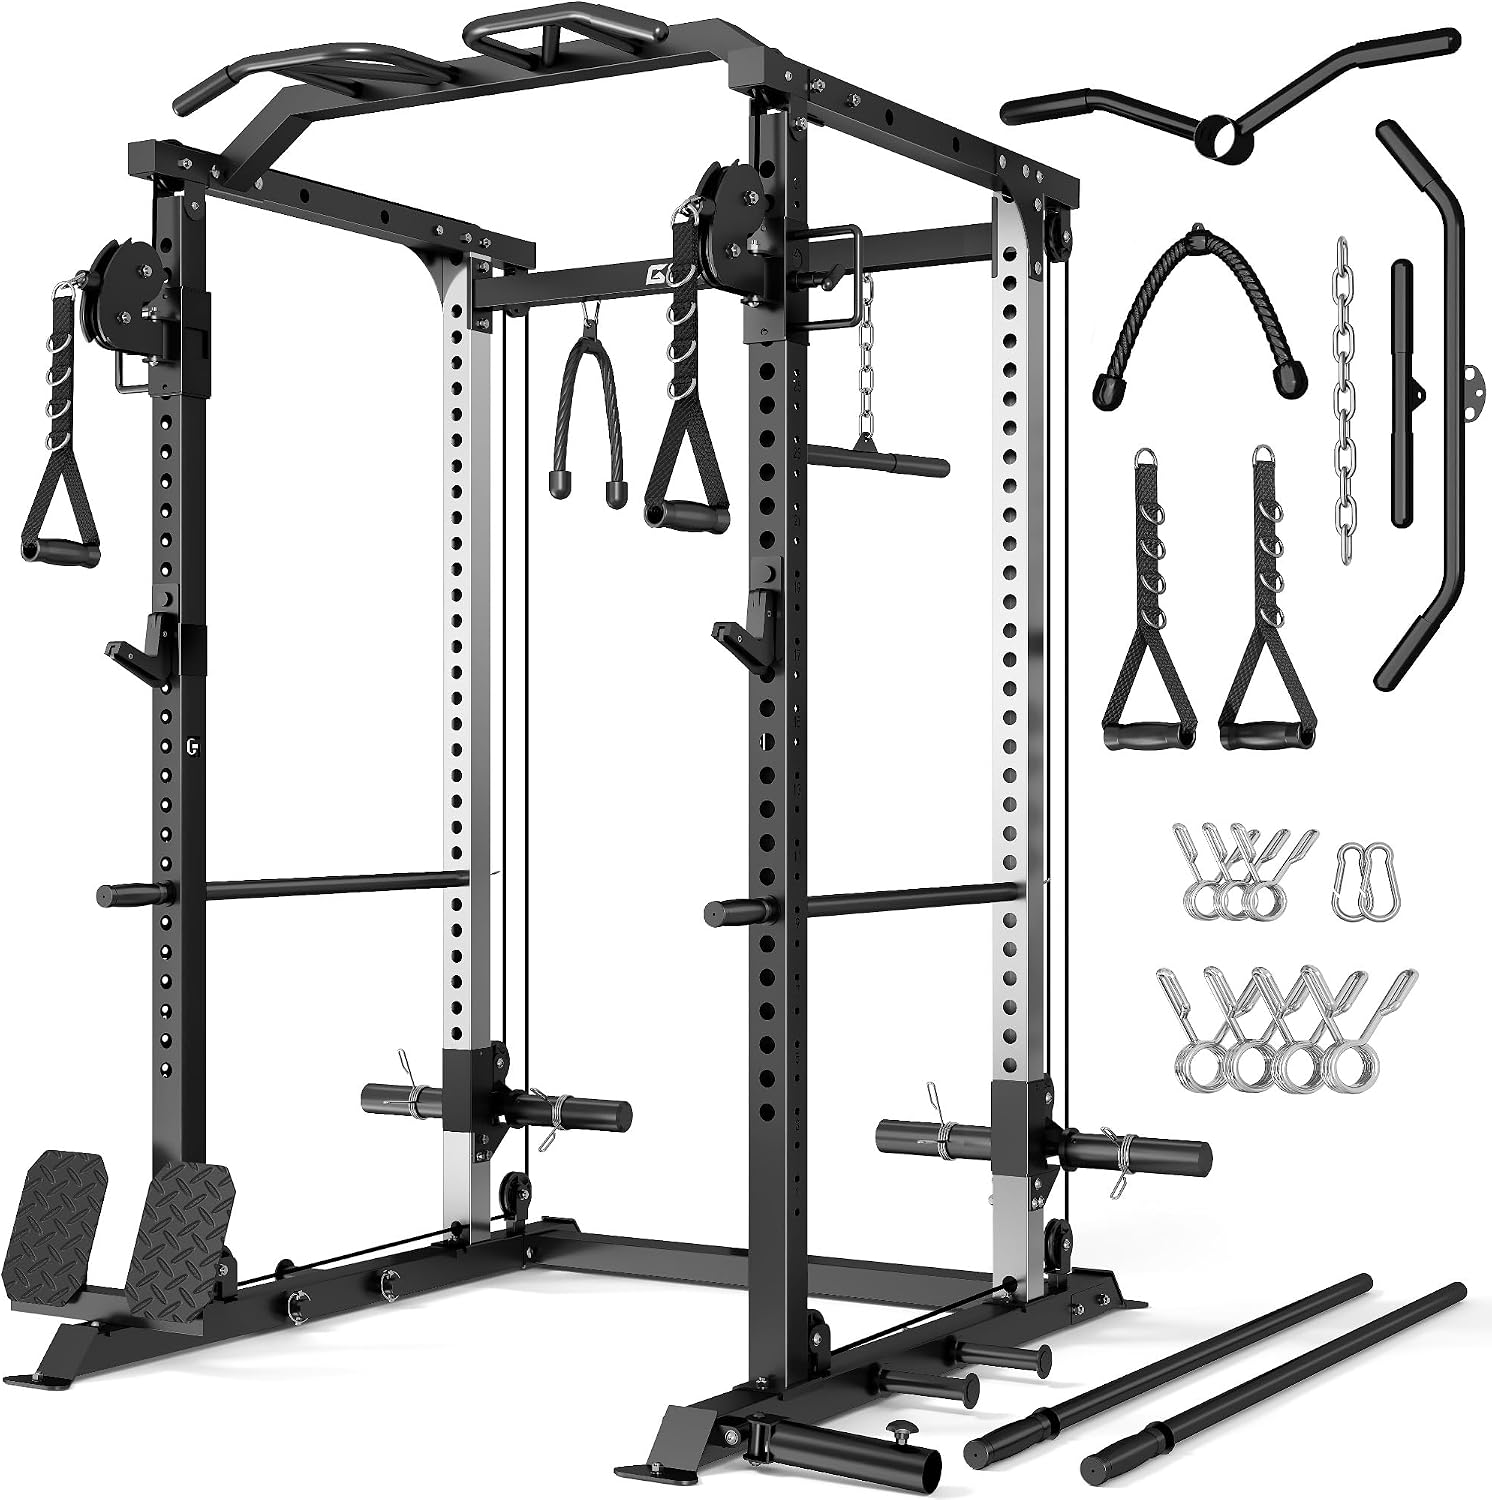
Value pick: DP01 Power Cage, 2000LBS Squat Rack with Cable Crossover and Dual Independent Pulley System, Full Cage for Full Body Training, Power Rack with More Training Attachments for Home Gym
 Visit on Amazon →
The DP01 is the one I would start with in a garage that has to serve both jobs. Full cage, cable crossover, and dual independent pulleys, which is the feature that matters most in a home setup. Independent pulleys mean each side runs its own cable, so a single-arm row, a single-arm press, or a staggered stance movement does not drag the other side along with it. A fixed cross-pulley system cannot do that, and you feel the difference the first time you try to train anything unilateral.
The listing rates the cage at 2000 lb, and the checklist above is how you decide whether that number means anything to you. Tube gauge and hardware grade are the two things to verify before you trust it with a heavy single. The attachment list is long, which is good and also a warning: every attachment is more assembly time and more bolts to re-torque after the first two weeks.
Flaws but not dealbreakers: A full cage with a crossover eats floor space and ceiling height. Measure both before you order, because tall uprights plus a loaded bar do not fit under a garage door track, and a light fixture above the rack is a broken light fixture waiting to happen.
Anyone who wants squats, bench, and cable work without buying a second machine should start here.
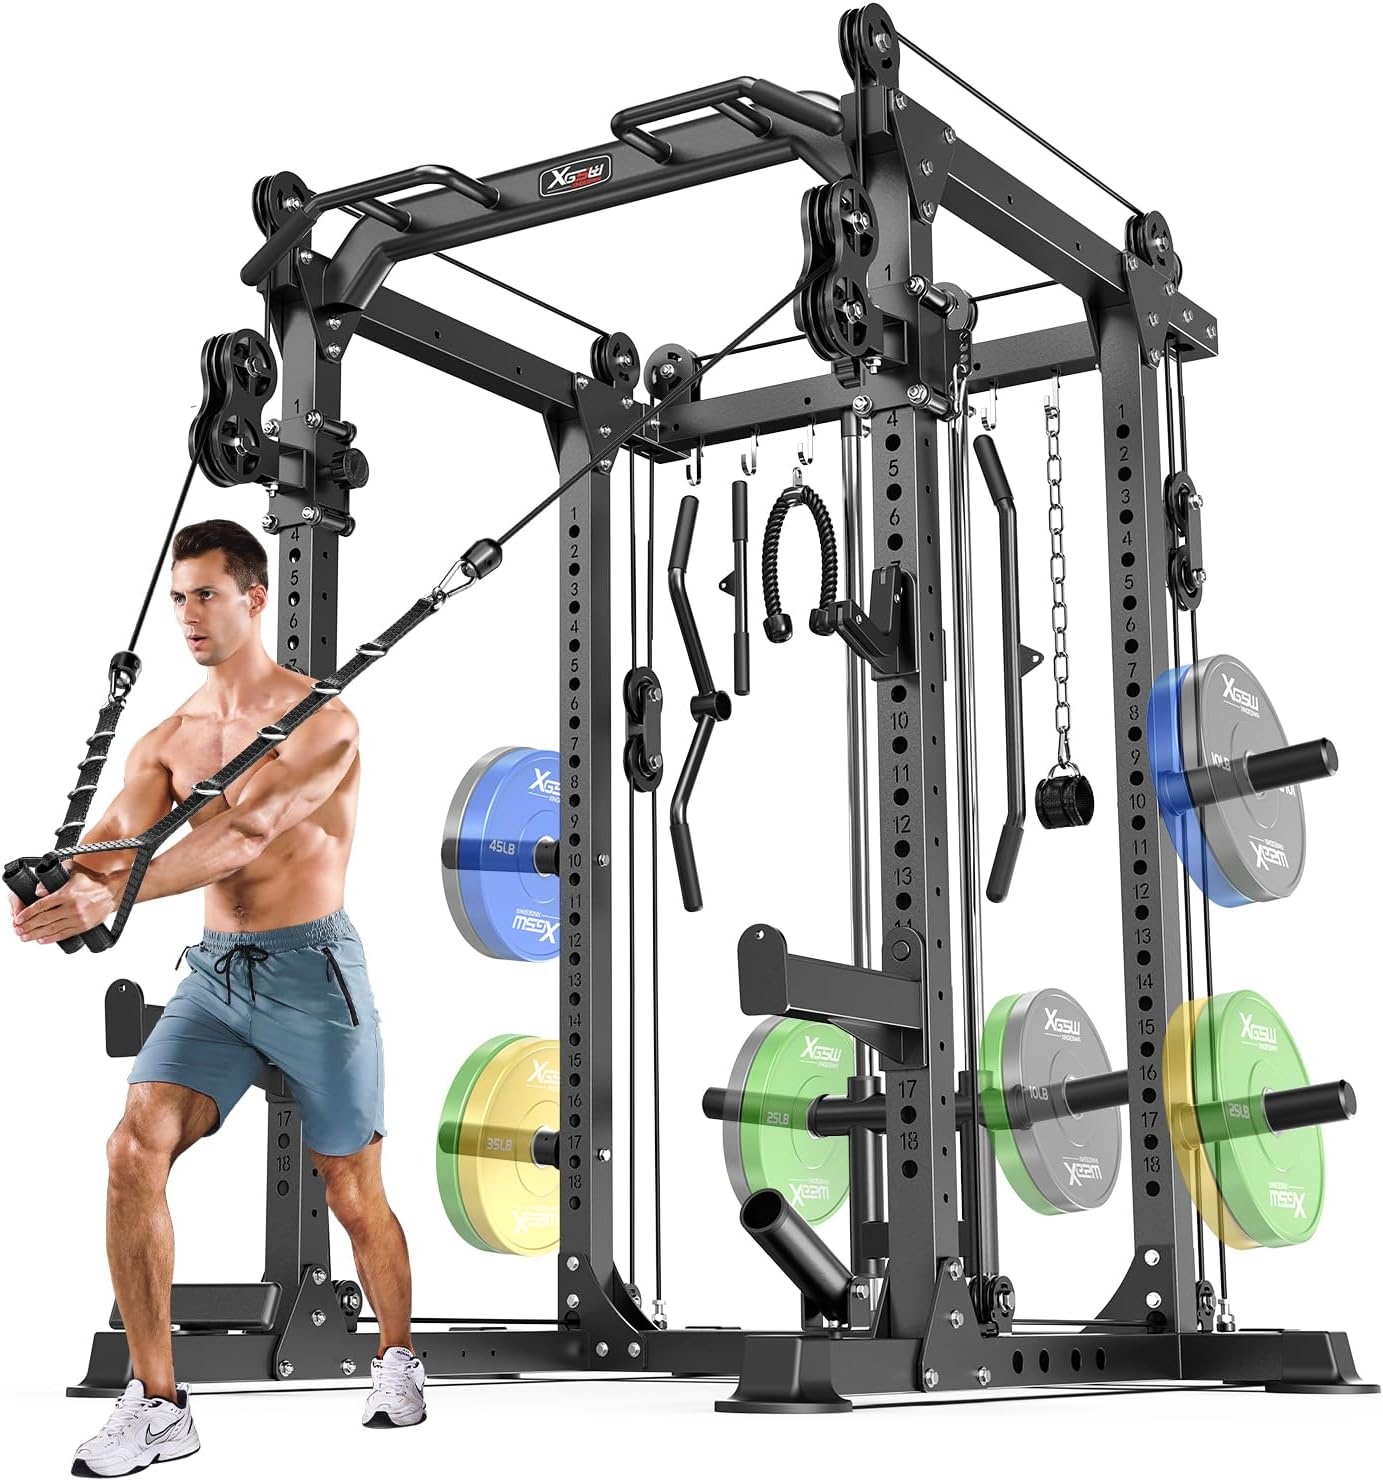
Upgrade pick: Power Rack Power Cage Multi-Function Squat Rack with Cable Crossover System Selectable More Training Attachment Power Rack for Garage & Home Gym
 Visit on Amazon →
The multi-function version is the step up. The cable system is selectable, which means you can set the pulleys where you want them and change the pulling angle without tearing the frame apart, and it ships with more training attachments than the DP01. In a garage, that selectability is the difference between a crossover you use twice and one you actually train on, because you can move from a high pulley to a low pulley to a mid-height press without fighting the machine.
More attachments also means more hardware and a longer build. Set aside a full afternoon, not an hour. Torque everything twice, once during the build and once after two weeks of use, because bolted joints settle and a settled joint is a loose joint.
Flaws but not dealbreakers: The extra adjustability adds parts that move, and parts that move need checking. If you will not re-torque and inspect a rack twice a year, buy the simpler frame and save yourself the maintenance.
Anyone who wants one footprint to cover lat work, rows, presses, and squats, with room to change angles, should look here.
The actual setup workflow
Now the part you came for. This order works on either rack.
Step one: Measure before you unbox. Ceiling height at the exact spot the rack will stand, not in the middle of the garage where the ceiling is highest. Bar path clearance above the j-hooks. Footprint plus at least a couple of feet on each side for loading plates and for spotting. Garage door tracks, opener rails, and light fixtures all live in the airspace above a rack, and all of them lose to a barbell.
Step two: Answer the anchor question before you build. Concrete slab, wood platform over joists, or a rental where you cannot drill. Write the answer down, because it changes how you orient the rack and whether you order anchors with it. If you are drilling into a slab, check for post-tension cables and in-floor heat lines first. Hitting either one is a very expensive afternoon.
Step three: Lay the frame out flat and leave every bolt finger tight. A rack squared on the floor while everything is loose will be square when you tighten it. A rack assembled one corner at a time will not, and no amount of muscle on the wrench later fixes it.
Step four: Tighten in a crisscross pattern, in stages. Bottom corner, opposite top corner, then the rest, then go around again. Grade-8 hardware, a real torque wrench, and no impact gun on the finish pass. An impact gun over-torques and you will not feel it until a bolt shears.
Step five: Stand it up and check plumb and level. Torpedo level on the uprights, tape measure across the diagonals. If the diagonals do not match, the frame is racked, and every bolt you tighten after that locks the error in permanently.
Step six: Anchor it, or prove you do not have to. If the rack is flat-foot and the maker says no anchors are needed, that is a claim, not a fact. Load it and watch the base. If it walks, tips, or flexes, anchor it or send it back. Do not bolt a cheap rack to the floor to fix a stability problem you should have solved by buying a better rack in the first place.
Step seven: Route the cables and check the pulleys. Cables should run straight off the pulley into the load, with no rub on the frame, the uprights, or a bolt head. A cable that touches steel wears through its coating and then through itself. Spin every pulley by hand before you load it, and if one squeals, grease it now rather than after the first snap.
Step eight: Set the j-hooks and safety bars. J-hooks at a height where you can unrack without a calf raise. Safety bars set so a failed rep lands on them, not under them, and not so high that they change your depth. Set the spotter arms at the same height you would want a spotter's hands.
Step nine: Load test in stages. Empty bar, then a plate per side, then work up. Watch the base, the corner joints, and the uprights at every step. This is the part people skip, and it is the only part that tells you whether the rack is honest about what it will hold.
Step ten: Re-torque after two weeks. Bolted racks settle. Go around the frame again after a couple of weeks of real training, then twice a year after that. Five minutes with a wrench is cheaper than a collapsed rack.
Cable crossover setup: the part most people get wrong
The barbell side of a rack is forgiving. The cable side is not, because a cable system that runs badly will teach you to avoid it.
Set pulley height for the movement, not for convenience. High pulleys for lat work and triceps, low pulleys for curls and rows, mid-height for presses and flyes. On a selectable system, change the pin position rather than fighting the cable from an angle, because pulling a cable sideways across its pulley wears the groove and the coating at the same time.
Check tension by hand. There should be no slack that snaps taut on the first inch of the pull, and no drum-tight cable that fights you at the bottom of a row. If the cable has a coating, run your hand down it once a month and look for fraying at the crimp and near the pulley. That is where they fail.
Do not clip a cable to the frame to shorten the travel or change an angle. Use the correct attachment and the correct pulley height. Cables are the one part of this machine that will hurt you quietly, and the fix is a two-dollar replacement part, not a story about how it snapped at the top of a face pull.
Common mistakes that cost you a rebuild
- Tightening one corner all the way before the frame is square on the floor.
- Drilling anchor holes before checking for post-tension cables or in-floor heat.
- Putting the rack where the loaded bar hits a door track or a light fixture.
- Setting safety bars below your sticking point, which means they catch nothing.
- Running a cable around the wrong side of a pulley and then wondering why it drags.
- Skipping the two-week re-torque, then finding a loose bolt with your hand mid-squat.
The competition and why it lost
A flat-foot rack without a cable system is a fine machine, but it is a different job. If all you do is squat and bench, buy the simpler frame and put the money into a better bar. This guide is for the garage that needs cable work too.
A wall-mount is great until it is not. If you do not hit a stud dead center, you are hanging your face from drywall, and a wall-mount cannot give you a crossover anyway.
A standalone functional trainer solves the cable problem but takes a second footprint and a second budget, and it does nothing for your squat. A rack with a crossover is the compromise that actually works in a two-car garage.
Anything with thin 14-gauge tube and a four-figure capacity sticker should stay in the box it shipped in. That sticker is a legal document, not a fact. Adjustable benches and flooring are their own guide, and both matter, but neither one is what keeps a failed rep off your neck.
What this all costs
The racks themselves: Check current Amazon price for the DP01, and Check current Amazon price for the multi-function cage. Budget separately for grade-8 hardware if the box ships with mystery bolts, an anchor kit if you are drilling into a slab, and rubber flooring under the rack so plates and concrete both survive.
The math that matters is not the sticker. It is the cost of doing it twice. A rack you have to replace because it wobbles at your working weight costs you the first rack, the shipping, the anchor holes you already drilled, and the weekend you spend rebuilding. A rack you buy once and re-torque twice a year costs you an afternoon and a wrench.
Do the measuring first. Build it loose, square it, torque it in stages, anchor it or prove you do not need to, run the cables straight, and load test it before you trust it with a heavy single. That is the job. Your rack is the one piece of equipment in the garage that has to outlive everything else you own, so build it like you mean it.