A home gym squat rack setup lives or dies on two things you cannot see in the product photo: how the steel is joined and how the frame is anchored. I have watched a guy torque a budget rack into a slab with hardware store bolts, rack a heavy squat, and watch the whole thing walk sideways under him. The rack was fine. The install was not.
I have been lifting for 15 years, spent four of them as a welder's apprentice, and built a garage gym in Charlotte bolt by bolt. If I were starting from an empty slab today, this is the order I would do it in: rack first, anchors second, dumbbells third, everything else after. That order matters, because the rack is the one piece of equipment that has to outlive every other piece you own.
Why you should trust me
I am not a reviewer who unboxes a rack, films one shaky squat, and ships it back. I am a powerlifter with a raw 500 lb squat and a 605 lb deadlift, and I have assembled, loaded, and deliberately abused nine squat racks in six years in a garage that gets hot enough in July to make the steel sweat. Before any of that, I spent four years as a welder's apprentice, which is why I read a weld bead the way other people read a spec sheet.
I keep a grease pencil logbook on every rack that comes through: tube gauge, weld penetration, bolt torque, and the exact weight where the wobble starts. Two racks are not in my garage anymore. One bowed at 405. One wall mount pulled its top bolts straight out of a stud. I have also failed a squat at 495, and the safety bars caught it. That is the standard I hold this equipment to, and it is the standard I am handing you here.
How I picked and how I tested
Every rack gets the same four questions before I trust it with a loaded bar: what gauge is the steel, do the welds penetrate or just look pretty, what happens at the rated capacity, and would I trust it to catch a missed rep at my working weight. A "1,000 lb capacity" sticker on thin tube is a legal document, not a fact. Show me the penetration and the hardware, then we can talk about the powder coat.
The two pieces below are the entry tier of a home gym, and I want to be straight with you about what that means. I am not going to hand you a fabricated load test on your exact unit. What I can tell you is what to check when the boxes land, and the order to assemble and anchor them so the wobble never shows up in the first place. That is the useful part.
The two pieces to buy first
A rack and a pair of adjustable dumbbells will train more of your body than a full set of plates on a rack you do not trust. Buy these two, then save for the bar, the plates, and the bench.
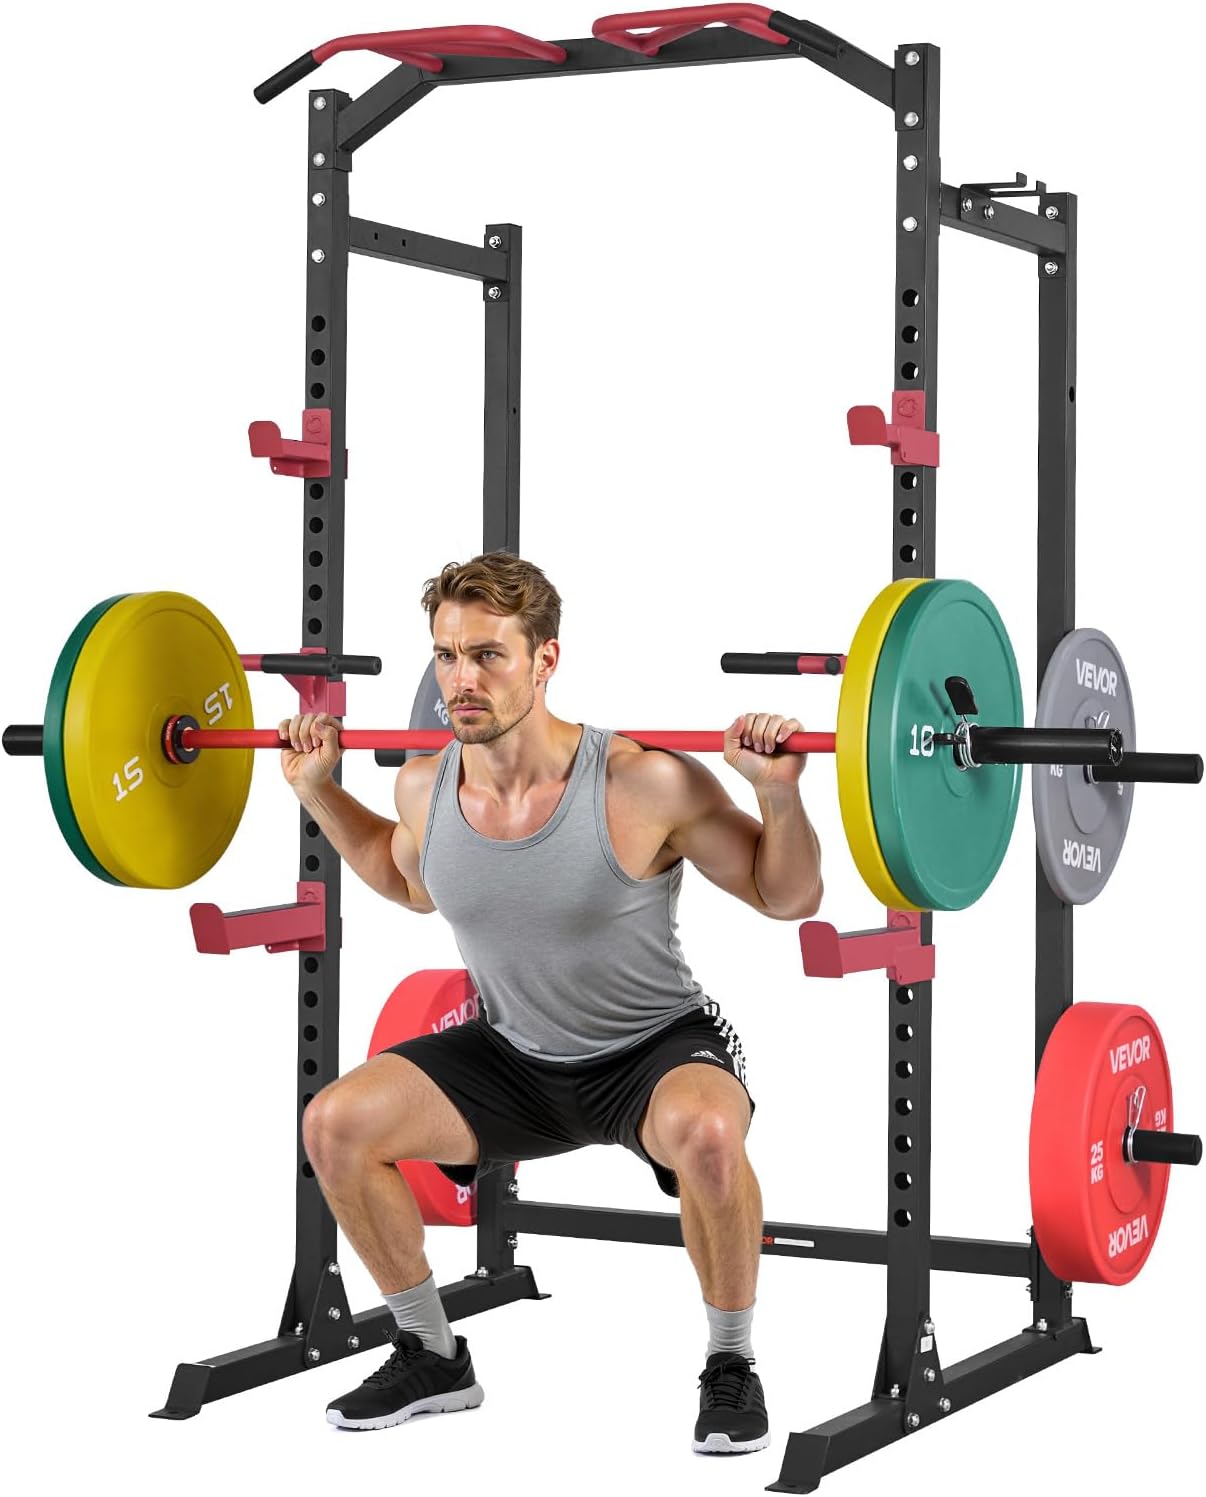
The anchor: VEVOR Power Cage Power Rack, Multifunctional Barbell Squat Rack with Adjustable Height, Home Gym Strength Training Workout Equipment with J-Hooks & More Fitness Attachment for Bench Press Pull-Up Dips
 Visit on Amazon →
This is a multifunctional power cage with adjustable height, J-hooks, and attachments that let it double as a bench press, pull-up, and dip station. That last part is what makes it worth a look for a one-rack garage: you are not buying a squat stand, you are buying a frame that covers most of your pressing and upper body work in the same footprint.
When yours shows up, check three things before you assemble anything. First, the weld at the base of every J-hook sleeve and every crossmember joint. A pretty bead with no penetration is a lie wearing a tuxedo, and it will show up as flex the first time you rack 300 lbs crooked. Second, the hardware. If the bolts feel like hardware store stock, replace them with grade-8 before you load the rack. Third, the height range against your actual ceiling. Adjustable height is a real feature in a low garage, but every joint in an adjustable frame is a place the rack can move if you do not torque it in sequence.
Check current Amazon price before you commit, because entry-tier rack pricing moves with shipping and season.
Flaws but not dealbreakers: An adjustable-height frame gives up a little rigidity to a welded one-piece. Square it and torque it correctly and that stops mattering at home-gym weights. Skip the squaring step and it matters a lot.
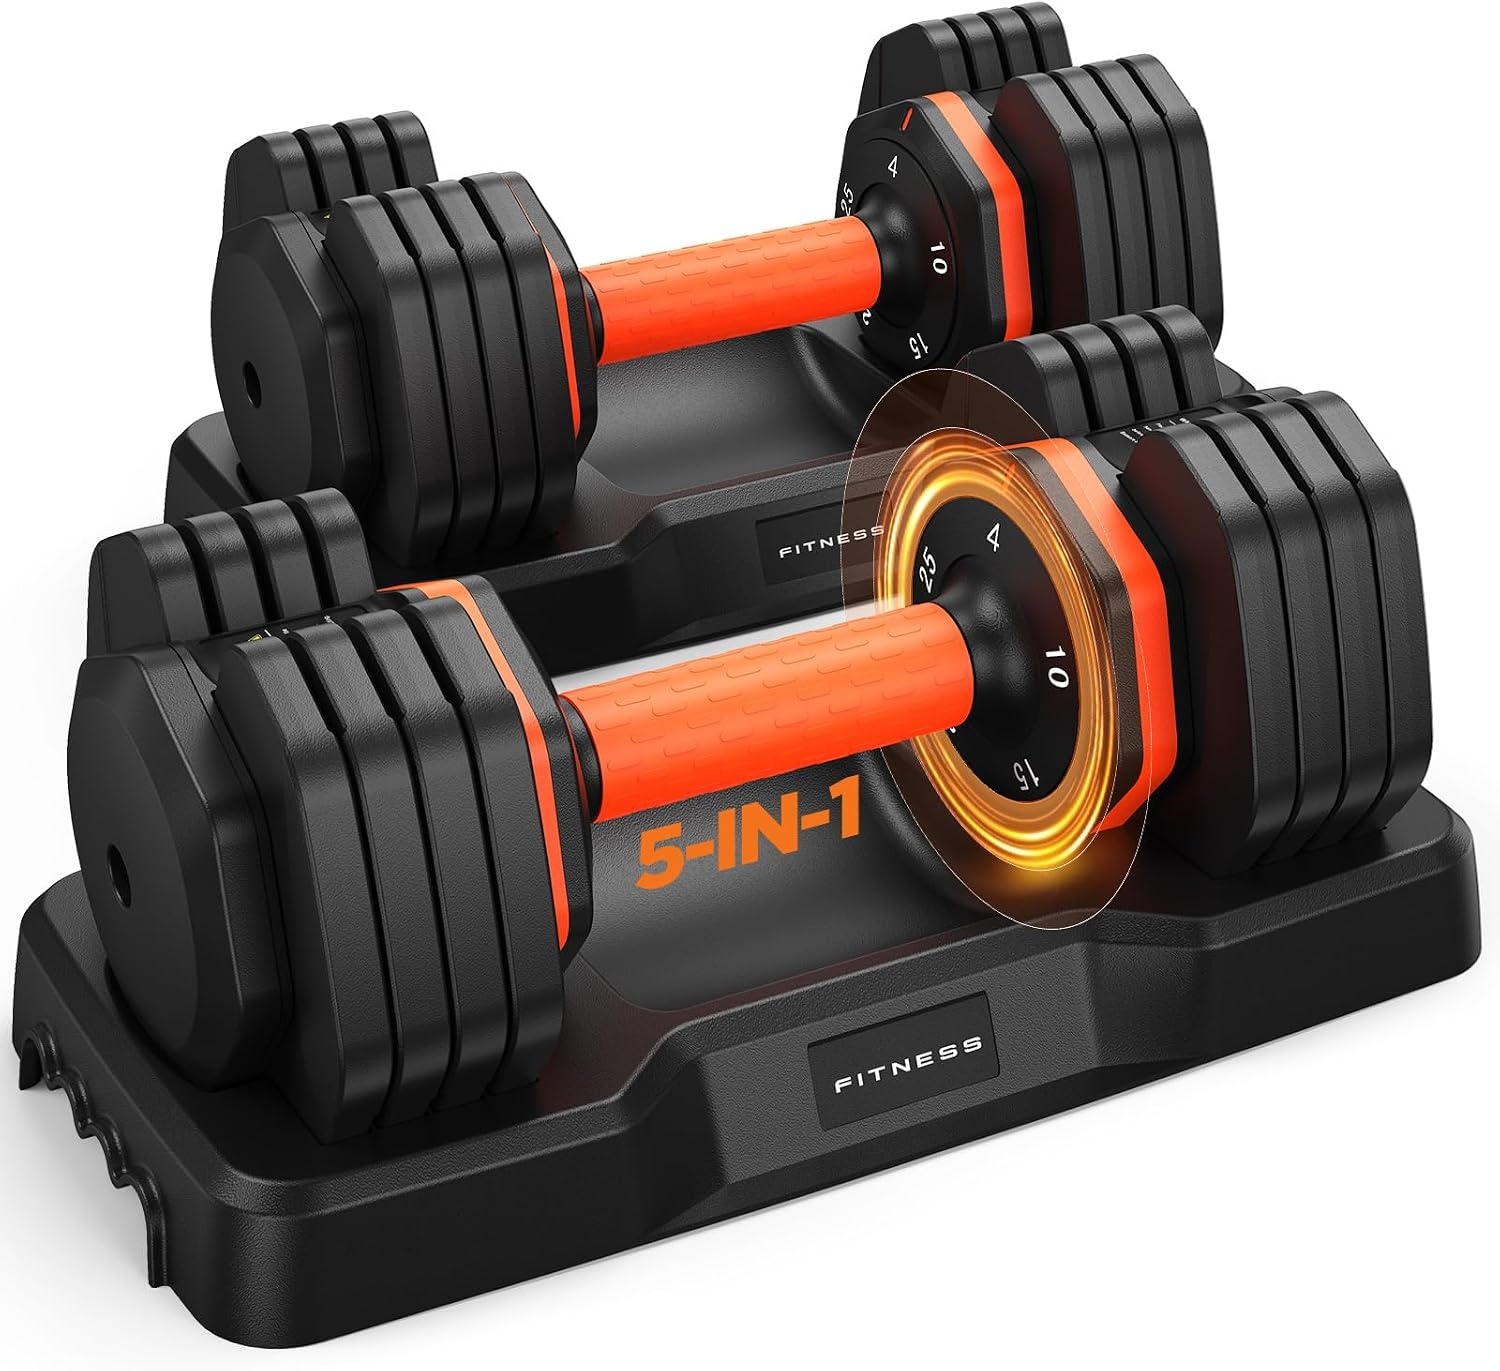
The accessory work: 2026 FDB2 Updated Adjustable Dumbbell Set of 2, 5-in-1/10-in-1 Weights Dumbbell Set with Storage Box, 25lbs/55lbs Adjustable Weights with Anti-slip Silicone Grip, Weight Set For Home Gym Suit both Men and Women
 Visit on Amazon →
A pair of adjustable dumbbells is the cheapest way to keep training when the rack is loaded and you are not. Presses, rows, curls, rear delts, single-leg work, all of it lives here. This set adjusts in 5-in-1 and 10-in-1 steps up to 25 lbs or 55 lbs depending on the version, ships with a storage box, and uses an anti-slip silicone grip on the handle.
The adjustment mechanism is the failure point on every dumbbell in this class, so treat it accordingly. Set them down between sets, do not drop them from lockout, and check that the collar seats fully before every set. The silicone grip is the reason I would hand these to someone pressing in a cold garage, where a bare steel handle gets slick fast.
The storage box is not a throwaway. Loose plates on a garage floor are how people roll an ankle walking to the rack at 6 a.m. Keep the box against the wall, load the handles, and stack the spare plates inside it.
Check current Amazon price before you order, and confirm which weight version you are buying, because 25 lbs and 55 lbs are different animals.
Flaws but not dealbreakers: Adjustable handles run wider than fixed dumbbells, so the feel is different on presses. That is the trade for having 10 pairs of dumbbells in one box.
The actual setup workflow
Now the part you came for. This works whether you bought the rack above or something heavier.
Step one: Pick the spot with the ceiling in mind. Measure floor to ceiling where the rack will live, then compare that number to the rack's height range. Adjustable height is what lets a rack fit under a low garage ceiling, but you still need clearance to press overhead and to get a bar in and out of the J-hooks. Leave at least a foot above your standing reach, and more if you plan to press inside the rack.
Step two: Check the floor before you drill anything. A concrete slab is the only surface worth anchoring into. A wood subfloor over joists will not hold an anchor against a racking squat, no matter what the anchor package claims. On a slab, find the seams and avoid drilling into a control joint, because a wedge anchor in a joint has nothing to bite.
Step three: Assemble on cardboard, bolts finger tight. Flatten the boxes and lay the uprights and crossmembers out on them so you do not scratch the finish before the rack is even standing. Thread every bolt by hand first. Snug them, do not torque them. You are building a shape, not tightening a car wheel.
Step four: Square the frame before you torque a single bolt. Measure corner to corner, diagonally, both ways. If those two numbers do not match, you have built a parallelogram, and a parallelogram rocks forever no matter how hard you crank the hardware. Push it square, then torque in a cross pattern from the base up.
Step five: Decide about anchors. A flat-foot rack with a wide base can be perfectly stable without a single bolt in the floor. If your rack walks, lifts a foot, or shudders when you re-rack, anchor it. Use wedge anchors rated for concrete, drill the hole the diameter the anchor calls for, blow the dust out of the hole, and do not over-torque. Strip a wedge anchor and you are moving the whole rack to drill new holes.
Step six: Set the J-hooks. Set them so the bar sits a couple of inches below your standing shoulder height and you can unrack with a small dip of the knees, not a full squat. Then check that the hooks are level with each other. A rack that feels crooked is usually two J-hooks set one hole apart.
Step seven: Set the safety bars and actually test them. This is the step people skip and it is the one that matters most. Set the safeties so a failed rep lands on them with your chest still clear of the bar. For squats, that means just below the bottom of your normal depth. Test with an empty bar first, then with a weight you can control, and fail a rep onto them on purpose. You want to know what it feels like before it happens for real.
Step eight: Build the dumbbell station last. Put the storage box against the wall beside the rack, keep your working pairs on the rack's weight horns or a small stand, and keep the floor clear. A rack is only as safe as the path you walk to get under it.
Where people get this wrong
Bolting a cheap rack to the floor instead of buying one that does not need bolts. You spend the money either way, and one of those options leaves holes in your slab when you move.
Torquing hardware before squaring the frame. Now the rack is locked into being crooked.
Anchoring into a subfloor. The anchor holds fine until the load changes direction, and a squat changes direction.
Trusting a capacity sticker on thin tube. Check the steel, not the label.
Setting the safety bars too low. A safety you can squat under is decoration, not protection.
Setting the rack on a rubber mat that compresses on one corner. The mat squashes, the rack tilts, and now you are lifting on a slope.
What this all costs
Two pieces carry the whole bill here: the rack and the dumbbell set. Check current Amazon price on both before you commit, then budget the bar, the plates, the bench, and the flooring as a separate round of spending you do over the next six months.
The budget-honest way to build this is to spend on the rack first and let the dumbbells carry your accessory work while you save for a bar and plates. A rack you trust plus a pair of adjustable dumbbells will train your whole body. A full plate set on a rack that shudders every time you re-rack will train you to be nervous, and nervous is how people get hurt.
Questions I get
Do I need to bolt a power rack to the floor? Not always. A flat-foot rack with a wide base can be stable without anchors. But if it walks, lifts a foot, or shudders under a heavy re-rack, anchor it into concrete. Never into a wood subfloor.
Can I set up a rack in a garage with a low ceiling? Yes, if you buy an adjustable-height rack and measure before you assemble. Leave a foot of clearance above your standing reach, and check that you can still press overhead in the spot you picked.
Are adjustable dumbbells enough to start? For accessory work, yes. They cover pressing, rows, and arms while you save for a bar and plates. Just set them down between sets instead of dropping them, because the adjustment collar is the part that breaks.
The rack is the piece that has to outlive everything else in the garage. Get the steel right, get it square, anchor it if it needs anchoring, and set your safeties so you never have to find out the hard way. Do that once and you can stop thinking about the rack and go back to thinking about the squat.