Most home gym squat rack problems do not announce themselves at your working weight. They show up early, as a half inch of walk across the concrete, a wall stringer that creaks when you re-rack the bar, or a J-hook that tips sideways because you racked crooked and nobody told you. Then one day you miss a rep, and the safety bars are the only thing between the bar and your neck, and you find out whether the whole setup was real or just a sticker.
I have failed a squat at 495 pounds. The rack caught it. That is the only test that matters, and every other number on the spec sheet is a promise you have to verify with your own hands before you trust it with your spine.
This guide covers both halves of the job: choosing between a full power cage and a wall mounted rack, and then installing whichever one you buy so it does not move. Not "so it feels solid when you shake it." So it does not move.
Why you should trust me
I have been powerlifting for 15 years with a raw 500 pound squat and a 605 pound deadlift, and I built the garage gym in Charlotte bolt by bolt after my old gym doubled its membership price in 2019. Before industrial maintenance, I spent four years as a welder's apprentice, which is why I read welds the way other people read spec sheets. A pretty bead with no penetration is a lie wearing a tuxedo.
I have assembled, loaded, and deliberately abused nine squat racks in the last six years. One bowed at 405. One wall mount pulled its top bolts out of a stud because the guy who hung it was half an inch off center and never checked. I keep a grease pencil logbook on every rack: tube gauge, weld penetration, bolt torque, and the exact weight where the wobble starts. I squat in that garage three mornings a week before work, so anything I recommend has to survive me, not a showroom.
How I picked and how I tested
The two racks below are not the only racks on the market. They are the two that make sense for the question this article answers: do you want a full cage, or do you want your floor back.
I am going to be straight with you about the limits here. Neither of these two has been bolted to my floor yet, so I am not going to tell you I loaded them to failure. What I can do is tell you exactly what the listings claim, what the design implies, and what I would check with a tape measure and a torque wrench before I put a loaded bar inside either one. That is the honest version, and it is more useful than a fake test number.
Here is what I actually look at, in order.
Steel gauge versus the sticker. Capacity ratings are marketing until you confirm the tube. A rack rated at 900 pounds or 2,000 pounds means nothing if the uprights are thin wall tube. If you own calipers, measure. If you do not, look at the wall thickness where the upright meets the base, because that is where flex starts.
Weld penetration. Look at the base plates and the J-hook arms. You want a visible, fused bead, not a bead sitting on top of the metal like frosting. This is the difference between a rack that holds and a rack that folds.
Base design. A flat-foot rack sits on the floor and relies on its own footprint. A bolt-down rack or a wall mount relies on anchors. Those are different failure modes, and they need different floors.
Hardware. Grade 8 bolts, not hardware-store zinc. If a rack ships with soft bolts, that is a tell about the rest of the package.
Safety bar rating. If the spotter arms or safety bars are rated below the weight you squat, they are decoration. Buy for the weight you will squat in three years, not today.
The two racks worth your money
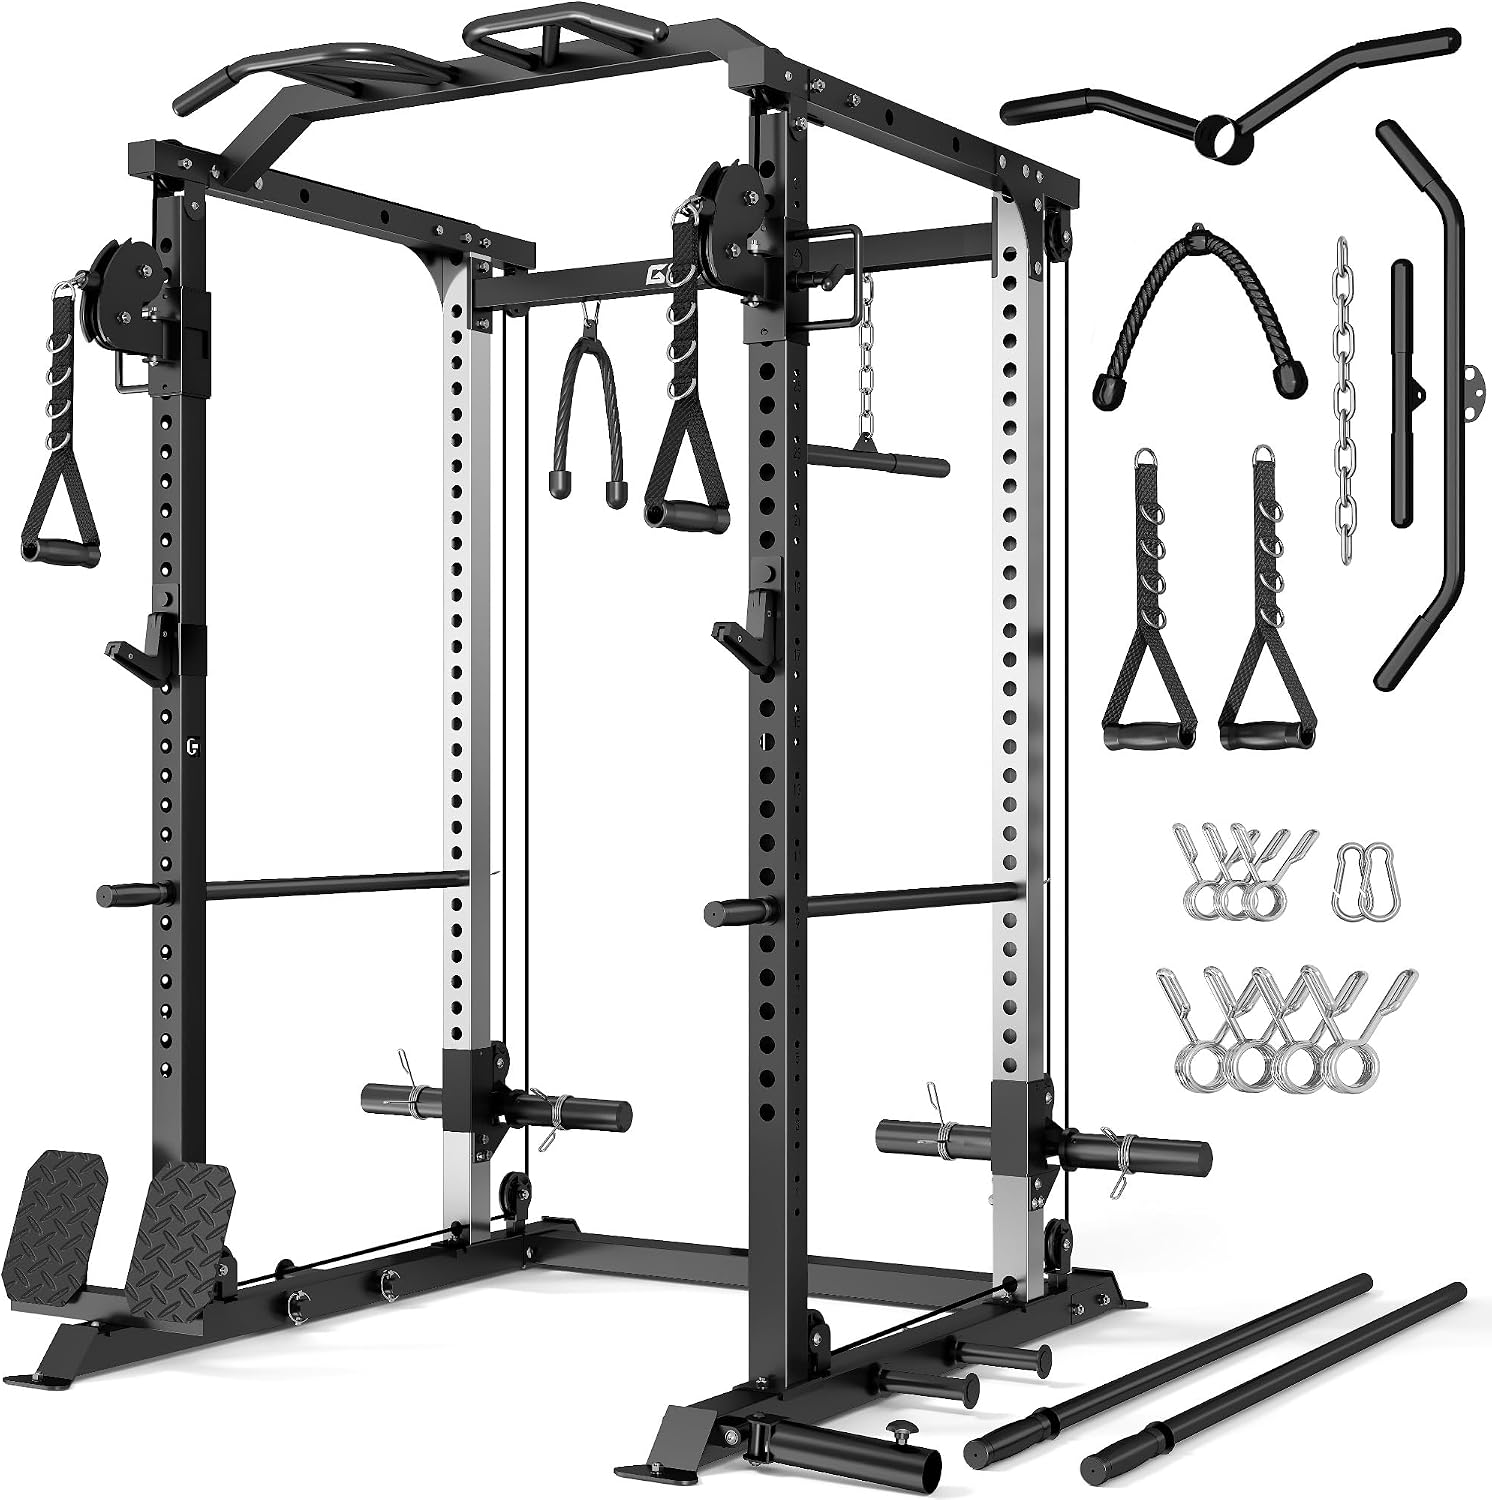
Best for a full home gym build: DP01 Power Cage, 2000LBS Squat Rack with Cable Crossover and Dual Independent Pulley System, Full Cage for Full Body Training, Power Rack with More Training Attachments for Home Gym
 Visit on Amazon →
This is the pick if you want one structure in the garage that does everything. It is a full cage, not a half rack, so you have uprights on all four corners, which means the load path goes down into the floor instead of through a pair of feet you are standing between. It carries a 2,000 pound rating, and it adds a cable crossover with a dual independent pulley system plus the usual training attachments. The pulley setup is the reason this one interests me and the reason I would inspect it hardest: every moving part is another thing that can develop slack, so check the cable tension and the pulley brackets before you load anything heavy.
Two things to plan for before you order. First, measure your ceiling. A full cage needs real headroom above the pull-up position, and a garage with a low door track will not forgive you. Second, decide now whether you are bolting it down. A cage this size is stable flat-foot, but stable and immovable are not the same word.
Check current Amazon price before you commit, and budget for rubber flooring under it, because a cage that walks on slick sealed concrete is a cage that will eventually walk into your drywall.
Flaws but not dealbreakers: More assembly than a wall mount, and more parts to keep tight. Plan on re-torquing everything after the first week of real squatting.
This is for the lifter who trains at home four or five days a week and wants squats, bench, pulls, and cable work out of one footprint.
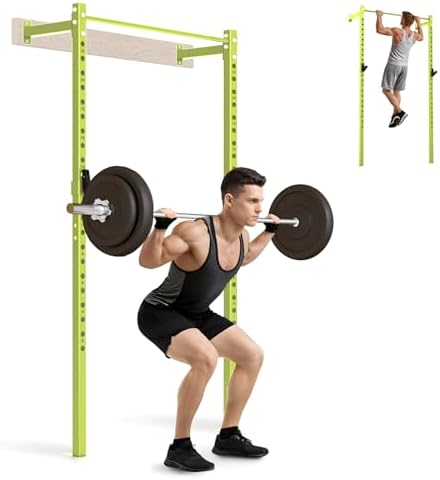
Best for a garage with no floor to give: SPORTSOUL Wall Mounted Squat Rack, 900 lbs Power Rack with Pull Up Bar
 Visit on Amazon →
This is the pick when the car still has to fit, or when the garage is a two-car space shared with a water heater and a lawn mower. It mounts to the wall, it carries a 900 pound rating, and it includes a pull-up bar. You get your squat and your pulls without giving up a single square foot of floor you can park on.
Here is the part people skip. A wall mounted rack is only as strong as the wall behind it, and the rack does not know the difference between a stud and drywall. I have seen one of these pull its top bolts clean out because it was hung half an inch off the stud center. Before you order, take a stud finder and map your wall. Verify each mark with a small drill bit. You want the mounting stringer centered on studs, spanning at least two of them, with the anchors torqued to spec. If your studs do not land where you want the rack, you move the rack, not the anchor.
The 900 pound rating is honest for what this is, but understand the load path: it goes into two studs and your wall, not into a concrete slab. That is a different kind of trust, and it needs a different kind of install.
Check current Amazon price before you commit.
Flaws but not dealbreakers: You cannot move it later without patching the wall, and it gives up some of the side-to-side rigidity a four-post cage has. Also, if your wall is masonry or your studs are steel, stop and figure out your anchor plan first.
This is for the lifter in a rental, a shared garage, or any space where floor area is the thing you cannot spare.
The actual installation workflow
This works for either rack. Do it in order and do not skip the last step.
Step one: Pick the spot and check the floor and ceiling. Measure overhead clearance for the pull-up position. Check the slab for cracks or a control joint, because you do not want to anchor into a crack. On a wall mount, confirm the wall is actually framed and not a furred-out concrete wall with an inch of air behind it.
Step two: Find the studs and verify them. Stud finder first, then a small drill bit to confirm. Mark both edges of every stud you plan to hit and mark the center. Center is the only mark that matters.
Step three: Check your hardware before you drill anything. Grade 8 bolts for steel, proper wedge anchors for concrete, and lag bolts long enough to get real thread engagement into the stud, not just through the drywall. If the rack ships with soft hardware, replace it. This is the cheapest insurance in the whole build.
Step four: Assemble the frame square, and torque in a cross pattern. Tighten opposite corners in sequence like you would a wheel, then go around again. Do not run one bolt to full torque while its neighbors are loose. That is how you build a rack with a twist in it, and a twisted rack wobbles no matter how tight the bolts are.
Step five: Set your J-hooks and safety bars. J-hooks at the height you unrack from. Safety bars set so a failed rep lands on them with your chest still clear, which means just below your bottom position, not at your knees. Check this with an empty bar before you ever load it.
Step six: Load test in steps. Empty bar. Then a plate per side. Then half your working weight. Then your working weight. At each step, rack the bar hard, watch the base and the wall, and listen. A creak is information. A crack is a stop sign.
Step seven: Re-torque everything after one week. Bolts settle. Wood compresses. Concrete anchors seat. Go back through every fastener after your first real week of training, and again a month later. Ten minutes, twice, and you are done.
Where racks actually fail
The capacity sticker on thin tube. A rating is a legal document, not a fact. Check the tube before you believe the number.
The off-center wall mount. Half an inch off the stud center turns a 900 pound rack into a drywall anchor with extra steps.
Safety bars set too low. A missed rep that lands at your knees is not a caught rep.
Anchors in the wrong floor. Wedge anchors need solid concrete. A thin slab or a post-tension slab is a conversation you have with a pro, not with a drill.
Slick flooring under a flat-foot cage. Sealed concrete plus a rack that is not bolted down equals a rack that travels. Rubber mats under the feet fix most of it.
The competition and why it lost
There are excellent racks I did not put in this guide. The Rogue RML-390F is the best flat-foot power rack I have loaded, with clean welds and real steel, and it does not move at 500 pounds without a single bolt in the floor. The Titan T-3 is the best budget rack that does not feel like a budget rack. The REP PR-4000 is the mid-range value pick, and the Bells of Steel Hydra is the dark horse with a bolt-down base.
None of them are here because this article is about two specific answers: a full cage that also gives you cable work, and a wall mount that gives you your floor back. If your budget and your space point at one of those two, you are in the right place. If you want a flat-foot platform rack and you have the money, that is a different guide.
What this all costs
The two racks here sit in completely different price brackets, and that gap is the whole decision. Check current Amazon price on each before you buy, because that number moves.
Then budget for the things nobody counts: rubber flooring, a stud finder you will use twice a year, a torque wrench, replacement grade 8 hardware if the included bolts are soft, and a box of concrete anchors if you are bolting down. Those items are cheap next to the rack, and they are the difference between an install that holds and an install that scares you every time you unrack.
The rack is the one piece of equipment in your gym that has to outlive everything else you own. Buy the one that fits your space, install it like your neck depends on it, because it does, and then go squat.
That is the job.